Alright, So You Want to Know How to Survive Winter Vanlife?
Living in a van in winter is challenging, there’s no two ways about it. Everything is more difficult: from keeping yourself & your living space warm to maintaining a healthy vehicle; to staying on top of your power and water, to finding places to park or recharge. Everything requires more time, planning and preparation.
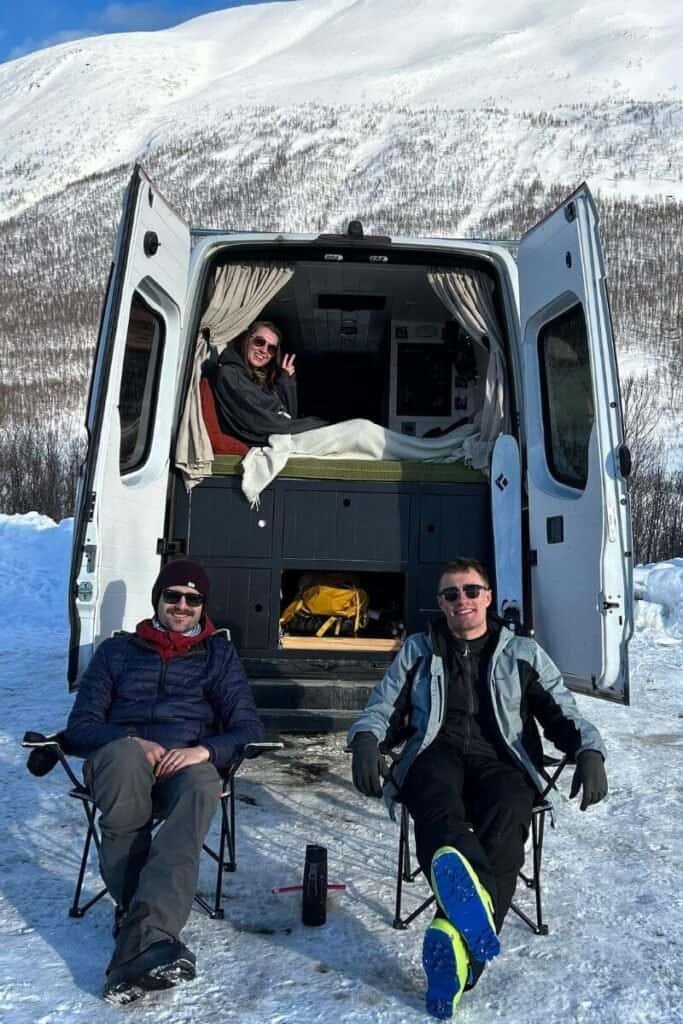
For us though, the potential rewards far outweigh the demands. Having spent two winters in our converted campervan, ‘El’, ski touring and venturing into the northernmost extremities of Scotland and Norway, we’ve been blessed with countless magical memories that will stay with us forever. And we won’t be stopping at two. ❤️️
In this guide, we dive deep into all the aspects you should consider before embarking on winter vanlife. We will cover everything from the planning phase of your campervan build and winterising tips for your van, to vital gear and safety considerations, to general advice on how to tackle common day-to-day challenges.
Hopefully, we can help you not just survive winter in your van but thrive.
Looking for general tips on living in a van? Check out our full guide here!


Benefits of Winter Vanlife?
Before diving into the challenges and meticulous planning involved, we feel it’s important to highlight the benefits of van living in winter. Why would you want to go through all this effort anyway?

Freedom to Explore With Your Home on Wheels 🌍
This is just one of the main draws of living in a van, period. However, we feel it’s an even greater asset in the winter when the weather can be more challenging and people are often not at their happiest.
If wherever you are isn’t working for you, it’s such an incredible feeling to be able to drop everything and go somewhere new.
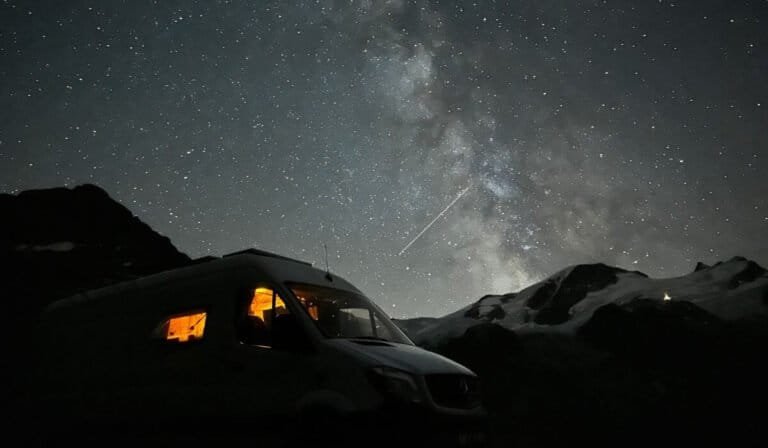
Spectacular Scenery 🏔
Winter is beautiful. The van allows us to access scenic winter landscapes filled with snow-covered mountains, frozen lakes, and frosty forests. Plus, we aren’t limited by where our accommodation is or by public transport routes.

Lower energy bills 💸
Although you will spend much more in winter keeping your van warm than you will in summer, it’s a damn sight less expensive than heating a whole house or apartment.
Fewer Crowds
This one is huge for us. Breath-taking locations, often overflowing with tourists in the summer, become serene and often exclusively yours to explore in the winter.
For example, the spectacular Quirang hike in the Isle of Skye, Scotland, is heaving during the spring and summer months. Boxing day 2023, we had the whole place to ourselves. There was a light dusting of snow, and barely a cloud in the sky. A perfect day. ❤️️

Looking to take a trip through Scotland? Check out our vanlife Scotland article.
A More Intimate Connection With Nature 🌷
Experiencing these beautiful places in the quieter winter fosters a deeper connection and appreciation. You have more time to absorb and live the experience and leave richer because of it.
Low Accommodation Costs
It’s pretty simple. We could not have afforded to spend a full winter exploring Norway if we did not have our van. Norway is spenny. So one of the most appealing aspects of living in a van in winter is the significant savings on accommodation.
Waking up at home, opening the doors and magically being transported to the base of the mountain, for zero cash, is an indescribable feeling. People can spend thousands to have that privilege.
Perfect for Winter Sports Lovers 🏂
If you love chasing the snow and love all manner of sporty adventures, winter vanlife is a no-brainer. You can ‘literally’ follow the snow. “Urrgh the conditions are crap here, but 3 hours west they’ve just had a dump of snow…. Let’s go”.
Saving on accommodation costs also lets your budget go further. This allows you to allocate more funds for activities like skiing, snowboarding, ice climbing, mountaineering, skating, snowmobiling, and any other winter activity that tickles your fancy.

If you love riding powder like we do check out our full guide to off-piste skiing here!
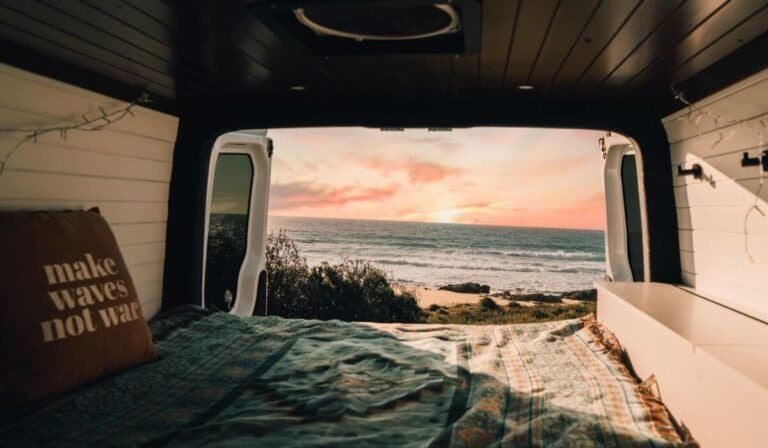
Cozy Experience in Your Van Home
If you have taken the time to craft a van that you enjoy spending time in and can bear the brunt of winter, then an advantage of the winter months is… spending time in it! We love spending time in our cosy home.
Bonding With Other Like-Minded Travellers 👋
During the off-season, there are typically fewer tourists, but there are still unique & interesting people you can meet on the road. This can often lead to wonderful shared experiences and lasting friendships.

Challenging Yourself & Personal Growth 💪
Surviving cold winter months in your van requires much more planning and preparation, which can be a fun challenge for adventurous spirits who enjoy pushing their limits. Facing and overcoming challenges along the way also helps to instil a stronger sense of self and a belief in your abilities. It certainly has for us.
Best Campervans for Winter?
…and the best campervan award goes to “Insert company name here”. Unfortunately, like life, it’s never that simple.
Everyone’s circumstances and goals differ and the perfect van for you might not be for someone else. However, there are some key factors to consider if you want to make winter van life easier.
Panel Van vs Semi-Integrated, Overcab or A-Class Motorhomes
To be off-grid capable in extreme winter conditions, such as in the mountains or chasing snow, a post-converted panel van (like a Mercedes Sprinter or Ford Transit) is superior to semi-integrated, Overcab and larger A-Class motorhomes for several reasons:
- They handle far better. The other types of motorhomes are often very top-heavy and rather difficult to drive in tough conditions. That instability is the last thing you want on slippery mountain passes in adverse weather & strong winds. They’ve been known to topple!
- More compact and more power. We’ve passed countless larger motorhomes struggling like hell to get up hills in winter that we’ve breezed up without issue in our Mercedes Sprinter.
- They aren’t as wide. Less important in the States, but this becomes very apparent in Europe. There are lots of small towns and extremely narrow roads. Many of the bigger motorhomes simply would not access certain places.
- Easier to stealth camp & find parking spots. Because they are more compact and don’t scream ‘IM A CAMPERVAN’ quite as loudly, people are more likely to leave you alone if you are stealth camping. Also, you will just physically be able to fit into soooo many more spots than if you had a bigger, wider motorhome.

4×4, RWD or FWD
This one is an easy win for 4X4, however, they’re not a viable option for everyone. They are much harder to come by, especially in the used vehicle market, and they are MUCH more expensive.
However, if you have the money and opportunity this is the best option for travel in all manner of tougher environments.
Coming in 2nd is the Rear Wheel Drive. Fortunately, this is the standard for the majority of panel vans on the market. Most vans for vanlife have a heavy butt and a lot of conversion weight will end up in the back over the rear tires. This will give you better traction and therefore more control in icy, snowy and hilly environments.
This leaves the FWD as the least favourable for winter van life. Now this certainly doesn’t mean that you can’t go and enjoy winters in a FWD. I’m sure it would do a good job for you.
It also depends on the size of your van and the specifics of your conversion. However, generally, they won’t be able to ‘pull’ you up hills quite as effectively.
Manual or Automatic
Initially determined to choose an automatic for our van conversion, chats with numerous mechanics convinced us to select a manual instead. Manuals offer advantages over automatics in snow and ice for several reasons:
- Engine braking: Downshifting in a manual transmission when driving downhill or stopping engages engine braking. This helps slow the vehicle without solely relying on the brakes, reducing skid risk on icy roads and the risk of your brakes overheating.
- Improved Control: Manual transmissions give drivers direct gear control, so you can choose which gear is best suited to the road conditions. This could prove essential for maintaining traction in slippery conditions like snow and ice.
- Starting in gear: Sometimes having the option of starting in second gear on slippery uphill slopes can reduce wheel spin, helping the van gain traction more easily than automatics.
- Less risk of overheating: Automatic transmissions may overheat when driving slowly in deep snow or on ice due to constant gear shifting, a risk that’s lower with manual transmissions.
Now if you already have an automatic van, this doesn’t mean you need to rush out and sell it for a manual. 99% of the time it will do you just fine.
However, for winter driving, manual transmissions seem to have a very slight advantage.

Does it Have a Winterised Living Space
This is by far the most important point for surviving winter in a van, especially in extreme cold. Whether you are renting a campervan for a week or converting one yourself, you need to ensure that you can stay safe and warm inside your van.
At the bare minimum the van needs to be well insulated, have an effective heating system and good ventilation.
In the rest of this article, we go in-depth into all facets of how to effectively winterise a campervan living space.
Staying Warm – The Best Heating Options for Winter Vanlife
The biggest question on people’s minds when it comes to spending winters in a van is how do you stay warm? Now, although the answer to this question goes far deeper than simply what heater you have, exploring the different heating options available to you is the most important place to start.
In this section, we will explore the different heating options for a campervan, some pros and cons, their costs, and some popular examples of each.
Quick Heater Tip 👍
Whatever heater you choose, if it comes with one, ensure its electronic thermostat is placed within the main living area of the van, away from heating vents or the heater itself. This ensures a more accurate temperature reading of the inside of your van.
Gas/ Diesel Air Heaters
Gas or diesel air heaters are popular options among campervan owners due to their efficient heat output and compact size. These heaters are plumped into the vehicles fuel tank and then work by drawing in cool air from outside, heating it up and then blowing it out into the living space of the campervan. They are usually installed under the drivers seat or inside a cabinet.
Pros:
- Efficient heat output
- Compact size
- Relatively easy installation
- Can be fueled by either gas or diesel
Cons:
- Can be noisy during operation
- Don’t function as effectively at altitude
- Harder to duct hot air all around the van effectively unless you have more than one
Cost: The cost of gas/diesel air heaters can range from £500-£1500, depending on the brand and model. There are much cheaper Chinese diesel heaters on the market but their reliability is questionable and we wouldn’t recommend solely depending one of those to get you through winter in your van.
Popular Brands/Examples: Webasto Air Top 2000STC, Eberspacher Airtronic D2.
IMPORTANT TIPS
- Ensure it has an automatic safety shut-off to prevent it from using all your gas, aiming to shut off at about a quarter tank. You don’t want to be stranded because you were heating up all night!
- When buying a diesel heater, consider what altitude it is configured for, as at higher altitudes it will ‘run rich’, less oxygen and consume more fuel and be more vulnerable to clogging as time goes on.
- Make sure the exhaust pipe from your diesel heater is facing in a way that it will not get burried in the snow. As this could lead to some of the fumes getting into your living space.

Combi Air & Water Heaters – Diesel or LPG (What We Have)
Combi air and water heaters typically use propane or diesel fuel to power a heating unit. The unit then heats up a coolant that circulates between the heater and a heat exchanger. This heat exchanger transfers the heat from the coolant to the incoming cold air, which is then blown into the interior of the campervan through ducts. At the same time, another part of the heat exchanger transfers heat to a separate water tank, providing hot water for your campervan.
Pros:
- Efficient heating for both air and water
- Saves space as it combines two units into one
- Most units can be fitted with ducting to ensure more efficient heat distribution throughout the van.
- Many versions can also be powered by electric when hooked up at campsites
Cons:
- Expensive upfront cost
- Propane versions require an additional fuel tank in your van
- Requires more planning and more complicated installation from beginning of build
- May require regular maintenance
Cost: The cost of a combi air and water heater can vary depending on factors such as brand, size, and installation fees. On average, these heaters can range from £1000 – £2500 or more.
Popular Brands/Examples: Truma Combi 4E, Alde Compact 3010, Aqua-Hot Gen1
IMPORTANT TIPS
We recommend a diesel combi heater over propane/LPG for two reasons:
- Our Truma Combi boiler works brilliantly but runs on LPG. It is more fuel-efficient, works better at altitude and is cost-effective, but finding LPG stations can be really challenging in certain countries. So not ideal if you plan to move around a lot. We might switch to a next-generation Truma Combi D in the future.
- Being able to read the level in your LPG tank in deep winters can be difficult. The tank either needs to be underslung or kept in its own separate box inside the van with a drop-out hole in the bottom for safety. No matter what we do the batteries for all tank readers we have bought have promptly died due to the cold!

Hydronic Heaters
Hydronic heaters are a popular choice for larger campervans or RVs and work by circulating heated water through a series of pipes and radiators. These heaters can use either diesel, gas, or electricity as a fuel source.
Pros:
- Energy efficient heat
- Much higher heat output than air heaters
- Can also be used to preheat the engine in cold weather
- Quiet operation
- Effective at altitude as don’t rely on oxygen for combustion like air heaters
Cons:
- Very expensive upfront cost
- May require professional installation
- Regular maintenance is necessary
Cost: The cost of hydronic heaters can range from £1000-£6000 depending on the brand and model and how deeply integrated it is in your van build.
Popular Brands/Examples: Espar D5E Hydronic Heater, Webasto Thermo Top Evo 5.

Wood Burning Stoves
Wood stoves have been used in campervans for a long time and are still a popular choice for some campers.
Pros:
- Cost-effective (wood is readily available)
- Can also be used for cooking
- Environmentally friendly
- Cosy aesthetic
Cons:
- Bulky and takes up space
- No way to regulate the temperature
- Requires proper ventilation to prevent carbon monoxide poisoning
- Requires constant topping up of wood
- Not overly practical for people moving around a lot in really cold winters
Cost: The cost of wood stoves can range from £200-£800 depending on the brand and model.
Popular Brands/Examples: Cubic Mini Wood Stoves, Dickinson Marine Newport Solid Fuel Heater.
Portable Propane Heaters
Propane heaters are another popular choice for campervans as they are relatively inexpensive and simple to use. These heaters work by burning propane gas to create heat that is then distributed throughout the campervan.
Pros:
- Affordable
- Easy to install and use
- Does not require electricity
- Can also be used as a cooking fuel
Cons:
- Can be bulky and take up space
- Not a dry heat (so moisture can be an issue)
- Requires proper ventilation to prevent carbon monoxide poisoning
- Limited heat output compared to other options
Cost: The cost of propane heaters can range from £100-£500 depending on the brand and model.
Popular Brands/Examples: Mr. Heater Buddy, Olympian Wave 3.
Electric Space Heaters
If you are planning to live off-grid in your campervan, 110v electric heaters are generally not practical. Even if you have a big enough inverter (minimum 1500Watts), the sheer amount of power they draw will not work for a campervan set-up if you are wanting to keep you’re batteries charged and the lights on.
Having a small electric or ceramic heater could be useful as an emergency back up heat option, or if you are planning on spending a lot of time in campsites hooked up to mains power.
Safety is Key ⛑
No matter the heating type, safety is key.
Ensure regular maintenance and proper ventilation to avoid hazards like carbon monoxide buildup. Have CO & Fire alarms installed in your van.
If you’re not an expert, have your system professionally installed for safety and optimal performance.

How to Winterise a Campervan: Van Build Considerations
Outside of simply what heating system you choose, preparing your van for winter living requires careful planning and consideration, right from the build phase. Below, we explore the key factors to keep in mind when designing your cosy winter abode on wheels.
Remember Vanlife is about compromise and weighing the pros and cons of every decision. “This is great for ‘X’ reason, but means I can’t do ‘X’”. Your only option is to align your design choices with your vision, goals and budget, finding the right balance for you.
To Bulkhead or Not to Bulkhead?
We don’t have a bulkhead. We love our Captains Chairs. They can turn 180º and it helps to open up the living space of the van. This was important for us. We also like to enter our van via the front doors. This allows us to take off our wet jackets and dirty boots in the front before we go back into the living space.
Unfortunately, the downside is that keeping the living space warm, especially in extreme winters, is much more difficult. We lose a lot of heat through the front cab.
To combat this and retain heat, we have a four-stage system depending on how cold it is:
- Stage 1 – we have an insulated front cab curtain on a rail, mainly used at night, to seal off the cab area.
- Stage 2 – Magnetic, blackout, insulated window covers from vanmadegear for the inside of the cab windows.
- Stage 3 – We keep a large blanket that can also hang over the insulated cab curtain.
- Stage 4 – When its really cold, an additional exterior window cover wraps around the front of the van, significantly aiding in heat retention (an essential for Norway when it was -20ºC outside). This setup not only keeps the heat in but also mimics double glazing for the cab windscreen, preventing ice build up on the inside of the front cab windows – a huge bonus.
Some pros and cons to keeping the bulkhead in are:
PRO – quicker to warm up and easier to retain the heat in your living space.
CON – you have to go out the side door anytime you want to access the cab or drive away. Plus, you always have to go in via the side door… what do you do with your snow-covered boots?
PRO – Better for safety in case anyone broke inside the van via the front.
CON – We found in extreme cold that the side door sometimes froze shut and wouldn’t slide open for a while. Not ideal if that’s your only exit…
Another option we’ve seen some winter vanlifers go for is taking the bulkhead out, but replacing it with an insulated wall of their own design to block the cab off.
This way you could also build in a sliding door or an opening so that you can still access the cab. You would then retain heat better but no captain’s chairs for you. Booo.

Insulation Foundation
Insulation is important year-round but becomes especially prevalent in winter. You want to make sure that you are losing heat from your living space as slowly as possible.
All van lifers agree that you have got to insulate your van. Unfortunately, everyone has a different opinion on the best way to do that. Honestly, this process is made far more complicated than it needs to be. 🙄
Our advice is don’t overthink it. The important things are that you find products with high R-values (a measurement indicating a material’s ability to retain heat) that are as light, affordable and versatile as possible.
Your exact mix will be your own. Just insulate everywhere you can, including the wheel wells, floors and roof.
For our van, we went with the following insulation behind our cladded walls:
- Spray foam and wool insulation to fill all gaps and air pockets in the van’s interior framework.
- Ecotherm insulation boards for the main insulation layer
- An additional layer of insulation foil on top of the ecotherm
- We covered all bare metal areas, such as wheel wells and around side and back doors with black felt.
- As we removed the bulkhead, we also insulated the area above the cab.
All of this will ensure a good Insulation Foundation. We will later explore additional areas that may benefit from adding insulation.

How many windows?
This one is quite a simple one.
More windows = more heat loss.
The fewer windows you have the easier it is to keep the heat in, plus more wall room for insulation. However, this would also mean less natural light and views from your living space. Which could lead to the van feeling more boxy and less inviting. 📦
Ultimately, the balance between windows or insulation will depend on your personal preferences and needs. Consider how often you will be using the van, what climate you will be travelling in, and how important natural light is to you.
If you’re considering adding more windows to your van, we highly recommend Dometic motorhome windows.
We use them because they’re double-glazed, minimising heat loss and include a built-in blind and mosquito screen. They slide open, allowing for ventilation, and you can opt for a tinted version for extra privacy.
For existing or single-glazed windows in your van, we strongly recommend using well-made insulated covers for all of them.

Heat Distribution & Circulation
This is one thing we don’t see talked about enough, but it is essential if you are considering cold winters in your van.
Things like your leisure batteries, water tank and your plumbing pipework are generally going to be built in behind your woodwork and inside cabinets. These are classic cold spots in a van. Leisure batteries hate cold, and you REALLY don’t want your water pipes freezing on you. 🥶️
Whatever heating option you choose, you want to ensure that the warmth in your living space is effectively distributed to all of the areas of your van that need it.
If you have a compact diesel air heater blower or two this could mean that you put in vents or openings in your cabinets around the van to allow the warmth from your living space to get into those areas. However, in serious cold, like -5ºC and below this may not be enough.
OUR BIGGEST WINTER BUILD TIP 💪
In our view, investing in a heating system with ducting is key for truly cold winters in your van.
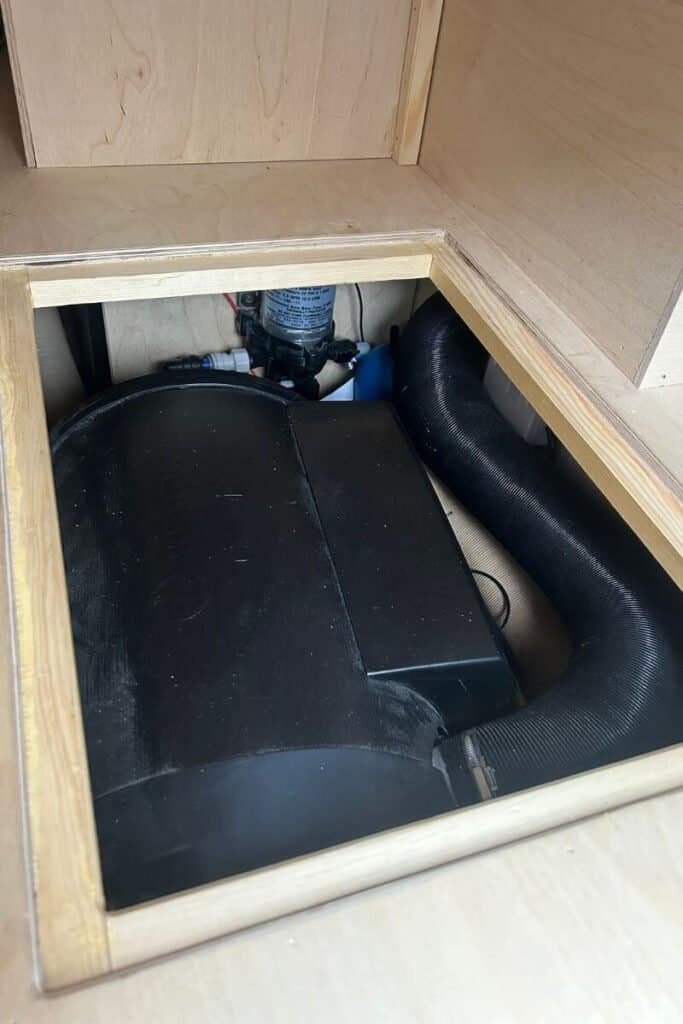
Our Truma Combi Boiler has four ducts that wind through the wooden framework of our living space, distributing warmth to four different areas of the van (front, back, middle, and shower cubicle) as well as targeting the van’s cold spots. The heating pipes inside your cabinets also radiate heat from the warm air passing through.
Some of our heating pipes run through our battery and electrics compartment, and right alongside our water lines. The Truma Boiler is also strategically positioned next to our fresh water tank, ensuring that that whole compartment under our bed stays TOASTY!

Electrical & Solar Systems ⚡️
If you dream of off-grid winter camping with luxuries like lighting, a fridge, heating, and electronics, consider investing in a robust electrical setup with versatile charging options for your leisure batteries.
Some of the main considerations for winter are:
- Opt for a robust electrical system with DC-DC charging to avoid being tethered to campsites and high costs. Ensure your leisure batteries can charge from your alternator while driving. Solar charging in winter is unreliable, so you may need to drive more to keep batteries charged for off-grid living. We use the ‘Victron Orion Smart DC-DC charger’ for efficient charging from our starter battery.
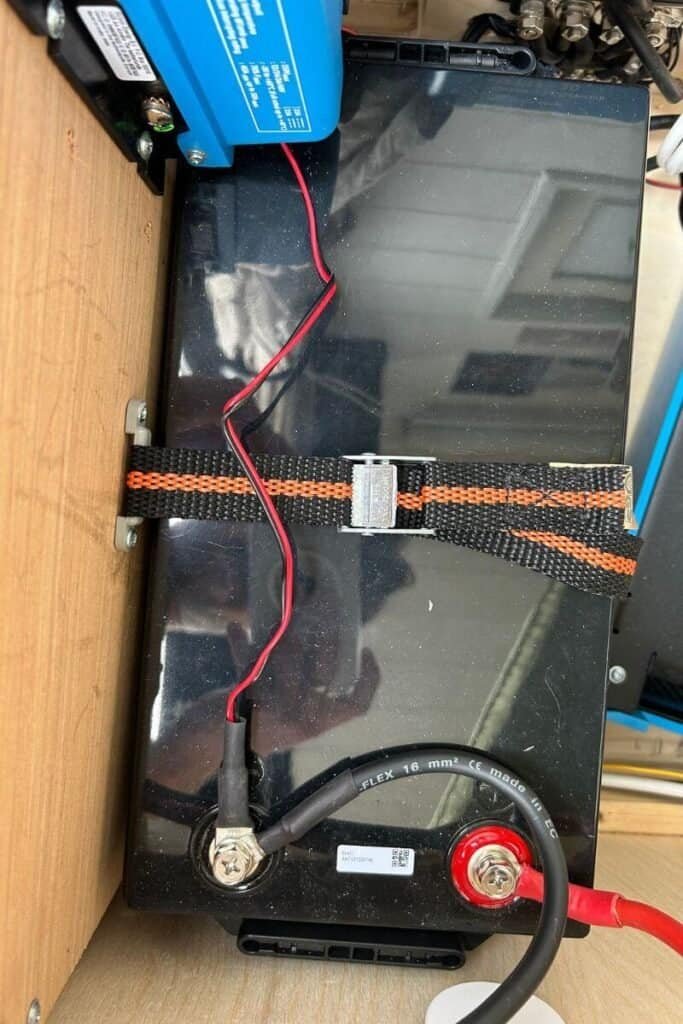
- We recommend Lithium Leisure Batteries for their superior performance in van life, especially in lower temperatures, compared to AGM or Lead Acid Batteries.
- For battery placement, unless you get underfloor heating ensure lithium batteries are off the van floor, preferably in a warmer area or near a heater. If they don’t have an internal heater, batteries may shut off in low temperatures, and AGM/Lead Acid batteries can physically freeze.
Our Electrical set up 😊:
- 300 Watts of Renogy monocrystalline solar panels
- 280 ah Fogstar Drift Lithium Leisure Battery
- 30 amp Victron Orion Smart DC-DC charger
- 800 Watts Victron multiplus Inverter/ Charger
- Victron Smart MPPT Solar charger

Plumbing 🛀
If you want to venture to extreme climates, to keep the water running all winter aim to install as much of your plumbing inside the van as possible.
Preventing your pipes from freezing is crucial, as expanding water can seriously damage them. External tanks will freeze in severe cold, unless emptied constantly. 🥶️
In some cold temperatures, insulation and heating elements, including a tank blanket or heat trace cables, might help stop your pipes and tanks from freezing.
However that will be a huge draw on power and won’t help in extreme cold (below -5 to -10ºc): any outside tanks will turn into ice blocks, becoming useless and dead weight. Therefore, ensure any external fresh, grey, or black water tanks are emptied and try to design your van with most plumbing inside.
For any internal pipework, consider elevating pipes off the floor if you’re heading to areas below -10ºC. Without underfloor heating, items in direct contact with the floor, especially in lower cabinets, risk freezing in extreme temperatures.
We placed some of the pipework that was close to the ground on DRY-Mat from Ship Shape Bedding to ensure an air gap between the pipe and the floor.
OUR BIGGEST PLUMBING DESIGN TIP 🚰
For very cold climates we can take the outside grey water tank out of the equation. We can redirect shower water directly outside instead of into the tank (be mindful of your parking spot and use eco-friendly products), or opt for showers elsewhere. Additionally, we have a smaller grey water tank under our sink for sink water, preventing freezing. However this does require manually dumping regularly.

Condensation & Moisture Control (Ventilation is Key) 🌬
Moisture control is crucial in van life, especially during the colder months. For optimal airflow and to prevent mould, ensure your van remains ventilated.
Maxxair Deluxe fans are a great investment, as they allow for ventilation even in rainy or snowy conditions. We have one in the front and one in the back of our van, so that as one pulls air, the other pulls it out. This is also an essential consideration when cooking or drying clothes. 🍲
Using a heater that emits dry air can also aid in air circulation and moisture control, circulating warm air inside the van when it’s too cold for outside air.
For air circulation beneath mattresses or sofa cushions, DRY-Mat from Ship Shape Bedding is useful. It prevents moisture accumulation by ensuring constant airflow.
Ensuring good air circulation helps prevent moisture buildup and reduces condensation on windows, which is crucial in winter to avoid ice forming inside. Having to scrape ice off the inside of your front windscreen before you can drive anywhere is a pain in the 🤬

Weight Distribution ⚖️
If you have a rear-wheel drive van, you want to make sure that weight from your interior build is as evenly distributed as possible over the two back wheels, and as much weight as is reasonable. This will ensure maximum traction between the tyre and the road, equalling more control when going up and down hills and in wet, icy or snow conditions.
For our build, we located our electrical compartment (leisure battery/ inverter etc) as well as our winter sports compartment (with skis & snowboards) over one wheel arch and the compartment with our fresh water tank and our Truma Combi Boiler over the other.

TIP
Ensure you consistently monitor your van’s weight, and know what weight classification it falls into, so that it doesn’t exceed it’s legal road limit!
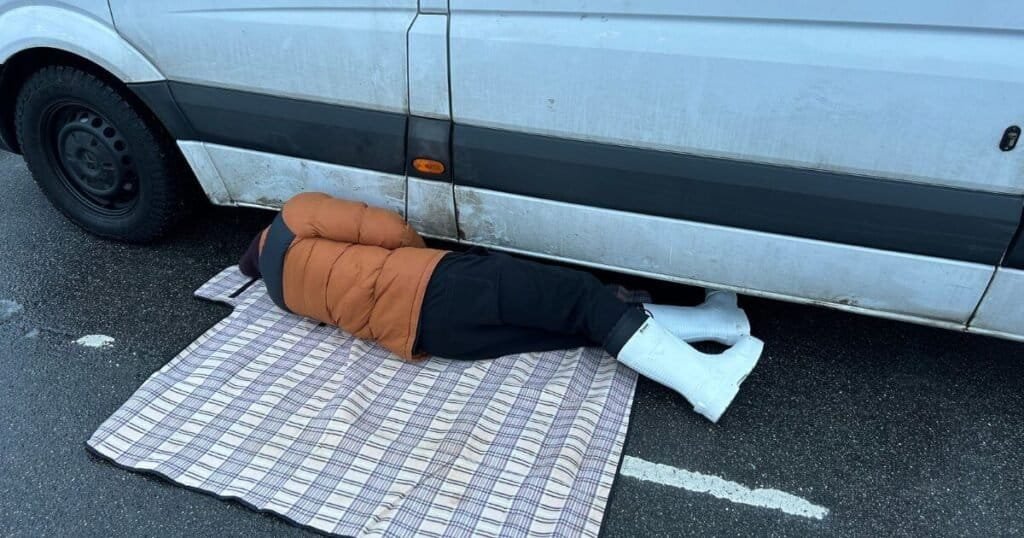
Preparing Your Van for Your Winter Road Trip
After finishing your van build, there are essential steps to ensure it’s ready for winter. Here, we list the key checks and modifications to consider, in order to best prep your van for a winter adventure.
Winter Tyres
This will obviously depend on where you are planning to spend your winter in your van.
If you’re heading to places with sub-zero temperatures and snow, seriously consider winter tyres.
At the very least, opt for all-season tyres marked with the 3PMSF (3 Peak Mountain Snow Flake) symbol, indicating suitability for harsh weather conditions, including winter. In some countries, these tyres are even a legal requirement during winter.
If you are thinking of visiting places like Canada or Scandinavia, tyres fitted with studs could also be a good idea.
IMPORTANT TYRE SELECTION TIPS❗️
Your van is designed to roll on specific-size tyres. You can’t just throw any tyre on there. Fitting larger wheels and tyres can start a cascade of handling and mechanical issues if you don’t plan carefully.
This can result in inaccurate speedometer and odometer readings. Also, larger tires may rub against the fender or suspension during turns, causing extra wear on suspension and brake components.

Check the Condition of Your Starter Battery 🔋
Make sure that your start battery is 100% healthy before travelling to extremely cold environments.
If it’s old or has poor connections, it could fail in cold weather, leaving you needing to jump-start it. So if that is the case it’s definitely worth the couple of hundred quid to replace it.
A simple test you can do with a multimeter can show if the starter battery is healthy: a reading of 12.6V usually means it’s fine, while below 12V suggests it needs replacing.
For more thorough tests, consider consulting a professional. If you regularly visit a mechanic, consider asking them to check the battery during your next service.
More Insulation!
🔌 PLUG ALL SOURCES OF HEAT LOSS …as best you can
Nothing reveals gaps in your insulation like winter vanlife. There are always going to be cold spots in your build, but you just want to make sure that they are plugged as best as you can.
Thoroughly check and think of any areas that get particularly cold, and what can you do to tackle that before the temperature drops and s**t gets real. 😬
Consider really important areas such as your battery compartment, fresh water tank compartment, all your water pipes and water filters. Can you add extra insulation or can you try and help more warmth from the living space get in there somehow?
ALSO, if you have vent fans in your roof make sure that you have insulated covers for them.

Check Vehicle Fluids are Appropriate for Colder Temperatures 💦
Before setting off on your winter vanlife journey, take the time to consult your vehicle’s spec sheet, or ask your local mechanic and make sure you select fluids that are compatible and designed to perform in the kind of temperatures you will be experiencing.
A huge one is the engine coolant, in extreme minus temperatures this can turn sludgy and will no longer circulate around the coolant loop in the engine bay meaning your engine will not start.
Also consider your engine oil, washer fluid and brake fluid. For Norway, we were using a 0W30 rated engine oil, which is specifically designed to perform in extreme conditions, ranging from -40°C to +40°C.
These liquids are the lifeblood of your vehicle. So do your checks and ensure your van will run smoothly, even in the harshest conditions.

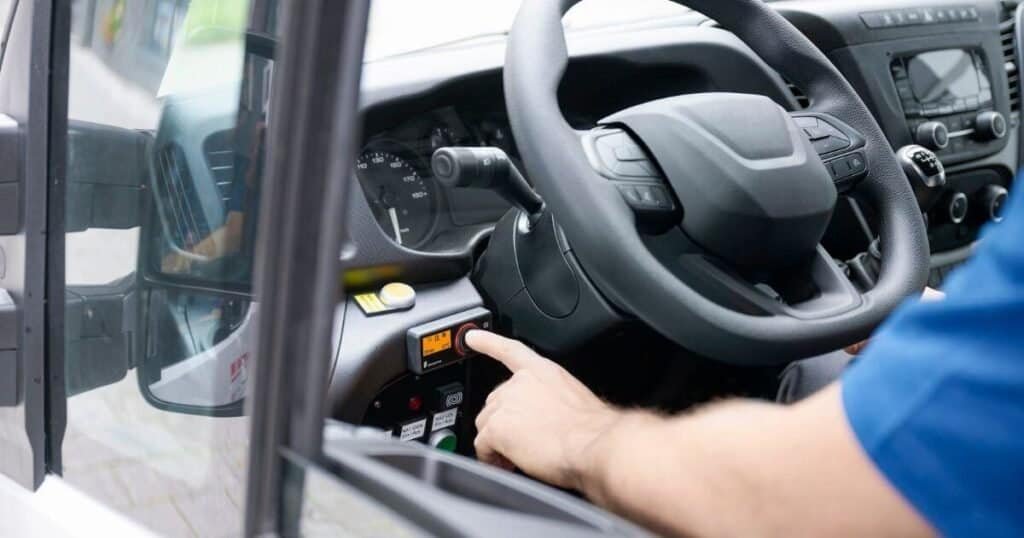
Engine Pre Heater
*The key that unlocked the door to our arctic winter vanlife dreams🗝 *
It’s crucial to note that this gear for your van is only necessary if you’re heading to extremely cold places, where temperatures are consistently below -10 to -15ºC. However, as we’re passionate about chasing powder (and a bit crazy 🤪), and always dreamt of spending winters in the Arctic Circle and Canada, it’s vital for us.
If the temperatures get cold enough, vehicles can just refuse to start, and that thought really scared us. And even when they do start, it can sometimes take a lot of revving and a lot of strain on your engine, which will shorten its life. 😞
Engine pre-heaters, like the Eberspacher Espar Hydronic S3 D5E Diesel Heater from Butler Technik, can be a game-changer. 🙌
They connect to your engine’s coolant loop, drawing a little diesel from your tank and power from your starter battery to circulate and heat the coolant. This means even at -25ºC, your van can start with the engine at a warm 60-70ºC, allowing instant warm air from your aircon and a happy engine.
Although costly and typically requiring professional installation, they are worth considering for those committed to extreme winter vanlife.
Popular brands – Webasto & Eberspacher (make sure to get one with an integrated pump)
IMPORTANT SAFETY TIP ⛑
Ensure the heater’s runtime matches your driving time. So if you have it on for 20 minutes make sure you drive for that long. This will ensure that you maintain the charge level of your starter battery and that it doesn’t die.
Suspension Upgrade
*Improved stability and clearance from snow* ❄️
Whilst not essential by any means, a suspension upgrade might be something worth considering. We had a 3.5-tonne leaf spring kit added to the rear chassis and extra suspension blocks, and we are really glad we did.
As a LWB Mercedes Sprinter, we have a big ass and are at near full legal capacity at all times. This can really wear on your suspension, especially in the colder months when there is also a lot of salt on the road eating away at the underside of your vehicle.
The extra suspension means there is less strain on the underside of our van, there is less rocking so we are more stable and handle better, and we also have an added few inches of clearance from the snow.
Essential Gear for Winter Vanlife: For Your Van & You!
Below, we explore gear and equipment that can be valuable in your van on winter excursions, ensuring safety, comfort, and peace of mind. 😌

Shovel/ Head Torch/ Gloves – Your Emergency Van Kit
Things can go wrong anytime but especially in winter. You might need to venture into the cold for checks and repairs, clearing snow or fitting snow chains. Therefore, keeping a small kit in the van with essentials like a shovel, head torch, and gloves is crucial for peace of mind, even if you don’t use them.
We recommend:
1. A reliable head torch suited for cold temperatures, ideally with a lithium rechargeable battery.
2. Several pairs of gloves for different needs:
– Lightweight work gloves for tasks requiring dexterity, such as changing a tyre.
– Disposable gloves for messy jobs like dealing with car oil or cleaning up.
– Waterproof, insulated gloves for handling snow chains, scraping ice, or digging out snow.

Snow brush, Ice Scraper & De-Icer
Clearing snow and ice off your windscreen can become part of your routine in winter vanlife.
We opt for an extendable & collapsable snow brush with an ice scraper on the end. All in one. Vanlife is all about versatility and space conservation. It has an adjustable length depending on how far you need to reach to clear the snow, but it also collapses down, making storage way easier.
Also, ensure you have a reliable De-icer for the temperatures you anticipate. In Norway, we purchased a local de-icer rated to -40ºC from a garage.
Snow Chains ⛓
Firstly, in snow-prone areas, having at least one pair of snow chains for your van is crucial. In places with heavy snow and very cold temperatures, carrying a second set for all wheels can offer extra control.
However, usually, one set for your drive tyres (front for FWD and rear for RWD) is enough.

IMPORTANT TIP❗
It may seem obvious, but ensure you’ve practised and are comfortable fitting your snow chains. You don’t want your first attempt to be in 2 feet of snow and -10ºC. Practise putting them on with your gloves on.
Jump Cables & a Portable Battery Jumper
We’re in the ‘I hope I never have to use this’ category. None of us should be on the road without breakdown cover.
Yet, in the rare event your starter battery fails and you can’t reach someone to come and sort you out by phone, having a set of heavy-duty jumper cables for your vehicle is a good idea.
As we often venture far off-grid, for peace of mind, we also carry a NOCO Boost 12v portable battery jumper.
This allows us to jump-start the van ourselves if the battery dies in the middle of nowhere. It’s a last resort we thankfully haven’t needed yet. But, knowing we have it makes us feel more secure, especially since our starter battery is more prone to failure in the colder places we visit. ☠️

Insulated Window + Vent Fan Covers
As discussed in depth further up in our guide, you will want to ensure that you have well-made insulated window covers for all of your van windows and vent fans. If not, these will be terrible culprits for heat loss and you will find it much harder to stay warm and cosy.
We use Vanmadegear magnetic window covers and an external thermal windscreen cover for when it gets really cold.

Traction Boards
Roads can be very slippery in winter. And in places where you get large amounts of snow and ice, having a good set of traction/ recovery boards could save you from calling a tow truck if you veer off the side of the road and get stuck in the snow. 😬
There are lots of different options and types of products on the market. So, you’ll want to find the best option for your van. However, the various recovery boards from Maxtrax are a popular option. They aren’t the cheapest on the market but they are tried, tested and trusted.
Basic Tool/ Repair Kit & Spares for Essential Items 🔧
Depending on your space, and DIY proficiency, it’s wise to carry a compact basic toolkit and familiarise yourself with basic repairs. It may also be worth carrying some spares of essential items. This will be very individual to you and your build.
We have a basic tyre puncture kit, socket set, adjustable wrench, wire stripper/ crimper, scissors, screwdrivers and some good ole trusted duct tape, amongst a few other items. We also carry an assortment of spare fuses and replacement light fixtures.
Also, you don’t want to overdo it as there is no telling what will go wrong on the road and you can’t prepare for all scenarios. We know some vanlifers who carry a backup cheap Chinese diesel heater, however, unless you are sure you could fit this yourself, it’s a bit of a pointless exercise.
Basic First Aid Kit 🤕
A basic first aid kit is essential for your vehicle all year round. It should include items to combat minor injuries. Key items to include are band-aids (for covering small cuts and scrapes), adhesive tape and medical wrap (for securing dressings or splints); antiseptic wipes and antiseptic cream (to clean and protect wounds from infection), and gauze pads for dressing larger injuries.
Heat gun 🥵️
This is another useful piece of gear to have in really cold places for peace of mind.
Even with all of our planning, -20ºC in Norway revealed a cold spot in our van that was not properly dealt with. One section of our water line partially froze overnight, meaning no running water from our tap when we woke up. I found the spot in question and after 5 minutes of caressing it with warm air from the heat gun, we had our water back.
TIP
If you don’t have a powerful enough inverter for a heat gun, there are some good cordless battery-powered options on the market. They don’t get as hot as plugged-in ones but they can still do a good job. We would also recommend getting 2 batteries, as they don’t last long and can take a few hours to charge back up.
Back-up Electric Heater
If your inverter can handle it, consider getting a small, portable electric space heater for emergency backup heat. Ensure you know its wattage and test it in your van before your trip. You don’t want to risk blowing a fuse on your electrics if your main heater fails. Bye-bye lights. 😬

Extra Blankets or a 12V Heated Blanket
Similar to the electric heater, carrying a good amount of extra blankets in case something goes wrong and you have to spend a cold night in the van is a good idea. They can also be great if you need to plug any gaps in your insulation you may have missed. OR, maybe you just want to get extra cosy.
We also have this 12v faux fur heated blanket that we pull out when we really want to treat ourselves. So good for cosy movie nights, and also great as a backup heating option ❤️️

Slippers & Rugs
If your van isn’t equipped with heated flooring, your van floor is going to get uncomfortably cold. There’s no two ways about it.
It’s crucial to compensate for that by ensuring you have nice, warm rugs to cover the floor. These rugs not only add a touch of warmth and comfort underfoot but also help in retaining heat within the space.
Additionally, investing in a good pair of slippers to wear around the van can make a significant difference.
For our winter in Norway, we invested in a pair of Rab insulated hut slippers. And you know what, they were a worthwhile investment, as they literally never left our feet when we were in the van. 👣
Winter Appropriate Clothing 🧣
This may seem obvious but it’s crucial for extreme cold. Pack smart to create an effective layering system – jeans and a jumper won’t be enough. You’ll need a variety of layers to adjust to conditions.
Besides your winter coats, scarves, gloves, and jackets, getting the right base layer is the key. We recommend breathable Merino Wool over anything like cotton. As we ski instructors say, ‘Cotton Kills’.

Snowboots 🥾
*Wet feet turning into ice blocks is a surefire way to ruin your day 😭*
During our winter in Norway, we always wore our Fubuki winter boots outside the van when not ski touring. They are the most effective winter boots we’ve ever worn. They’re fleece-lined, incredibly comfortable and warm, surprisingly light, more flexible than they appear, and completely water-resistant.
Admittedly, they’re a luxury and not for everyone. But don’t skimp on footwear for snowy destinations. Invest in a sturdy pair of winter boots.

Extendable Ladder
If you have a big van with solar panels but no fitted ladder, ensure you can access your roof to clear the snow.
We opted for an extendable ladder over a fixed ladder for safety. We didn’t like the idea of people being able to climb onto our roof willy-nilly. It also makes accessing any part of the roof easier.
Additional Water Containers
Finding places to fill up your fresh water tank can be much trickier in the winter depending on where you are. So it may be useful to have the option of carrying more water on board to make each fill-up go further. 👍
We carry 3 5-litre water bags and 2 2-litre water bladders to get 20 extra litres on board, as well as our 60-litre fresh water tank if we feel the need.
Autophix 3210 Diagnostic reader
This is far from essential, however, it’s a useful piece of kit to monitor your vehicle more accurately.
It is a small device that plugs directly into your van’s OBDII port, providing real-time data and error codes related to your vehicle’s performance, to an app on your phone.
This makes it easier to quickly identify issues as they arise and perform necessary repairs (or quickly describe to a professional what needs to be done 😂, saving time and money)
Also, with the engine pre-heater, we don’t get clear coolant temperature readings. I regularly use this to monitor the engine’s coolant temperature and determine when to turn on and switch off the heater.
Front Grill Cover
Please note, that this is specifically for extreme winter environments, where temperatures regularly plummet below -20ºC. ❗️❗️
A grill cover shields your vehicle’s radiator from cold air while driving, ensuring it maintains optimal operating temperatures in severe cold conditions.
We DIY’d this with layers of cardboard and insulating foil, cut to shape and taped together. It simply wants to cover the front grill of your van. It also doesn’t need to be perfect, as it doesn’t want to COMPLETELY block air hitting the radiator, just mostly.
However, only put this on your vehicle if the temperature is -15ºC or lower. It’s crucial to understand that applying this in milder conditions, where temperatures do not drop so drastically, can be hazardous. The heat from the radiator cannot escape, leading to the risk of your engine overheating.
Breakdown Cover
Okay… so not a piece of gear, but still an absolute essential. ❗️
For peace of mind before your winter trip, ensure you have breakdown cover and roadside assistance for your destinations.
Day to Day: Tips for Living in a Van in Winter
In this section, our goal is to provide guidance that will make your day-to-day winter vanlife experience easier.
Drawing on our personal experiences and the lessons we’ve learnt, we cover topics such as finding parking spots, ensuring your leisure batteries remain charged, securing water sources, and much more.
Weather Monitoring ⛈
As vanlifers, we’re at the mercy of the weather, which greatly influences our daily activities on the road. This impact is even more significant in winter, especially in extreme climates, where conditions can be dangerous without proper preparation.
To be ready for any weather changes, driving conditions & potential road closures that could affect our trip, where we park & what we do, having the most reliable weather and traffic apps for your location is essential. This needs planning and research before your trip.
For us powder chasers, keeping a close eye on the weather is especially crucial since we frequently park at high altitudes.
A perfect spot at the base of a mountain one evening might require a swift evacuation if a storm appears to be on the horizon. The last thing you want is to be snowed in and stranded!

Driving in Winter
Firstly, take the time to ensure your vehicle is winter-ready by having good winter tyres, snow chains and any other items discussed in the previous sections.
Once out on the road here are some essential driving tips tips to help you tackle the winter roads with confidence:
- Before you set off ensure your lights, especially your brake lights are functioning correctly.
- When driving in snow or ice, reduce your speed and leave more space than usual between you and the vehicle in front. This increased gap gives you more time to react and stop if necessary.
- Use gentle manoeuvres and avoid sudden stops or sharp turns to maintain control.
- If your van begins to skid, steer gently in the direction you want to go, and don’t panic.
- In Icy conditions try to only apply the brake when driving in a straight line, and not when going around corners.
- When descending hills in a manual van, select a low gear to use both engine braking and slight brake application to maintain a slow speed.
- On slopes, you’ll often move slower than surrounding traffic. It’s wise to pull over occasionally to let traffic pass if it’s building up behind you. This prevents moody beeps and avoids feeling pressured or panicked by other drivers.
- Keep an eye out for advisory road signs.
- Finally, always assess the necessity of your trip if the weather is bad. Often, the safest choice is to remain where you are and wait for improved conditions.
BONUS TIP
When living in your van over the winter months, it is a good idea to ensure that your vehicle always has at least a quarter tank of fuel to prevent the fuel lines from freezing.

For a complete guide on all things winter driving and what to do in an emergency check out the AAA Winter Driving Tips page
Make sure you are filling up with the right fuel
In some countries during winter, it’s advisable to choose winterised diesel, which contains additives to stop it from gelling and freezing. This is particularly important in areas where temperatures frequently drop below -5 to -10ºC.
Many countries accustomed to cold winter temperatures typically offer this as a standard option at most fuel stations. However, it’s important to research and ensure this is available wherever you’re heading.
Keeping your Leisure Batteries Charged + Power Saving Tips
Less Sunlight = Less Solar
Keeping on top of your electricity is much harder over the winter months. Fewer campsites are open and because the sun is much lower in the sky and your days are shorter you often won’t get even a ¼ of the solar you get in summer.
But to keep our batteries healthy, it is vitally important that we never let them run out of juice.
Here are some tips on how to keep your batteries charged:
- Alternator Charging – This is our number 1 tip. If you have leisure batteries make sure you can charge them while you drive via the vehicle’s alternator. This is a lifesaver over the winter months. Use a DC-DC charger like the Orion Smart from Victron. ⚡️
This will mean that you need to drive more miles out of necessity in winter than you do in summer to keep the batteries topped up.
However, if you are on a road trip you will already be doing plenty of miles, and it will reduce the amount of time you have to worry about energy-saving measures like some of the following points. 😊
- Keeping your solar panels clear of snow will ensure that they are soaking up every little bit of sun they can.
- Never skip an opportunity to plug your batteries in and get a full recharge. This could be at a friend’s house or a campsite.
- To save on energy always turn off appliances that are not in use. Even turning off your inverter overnight or when you aren’t in the van can save on power.
- Consider eating and showering out of the van more often if you can afford it.
- Charge items like phones and laptops at coffee shops and leisure centres. ☕️
- Having tiltable solar panels is quite beneficial for capturing more sunlight during the months when the sun sits lower in the sky.
- Park in spots that are not shaded and have more chance of getting sun. ☀️
- If you have a fridge and tupperware, consider doing more batch cooks. We also use a wonderful piece of gear called ‘THE WONDERBAG’ which is a non-electric slow cooker and saves on power consumption when cooking.
- Wear more layers inside the van, therefore reducing the temperature you need to keep the van at, and reducing the workload on your heater. 🧣
- Insulate, Insulate, Insulate – the more you’ve effectively insulated your van the less heat you will lose and the less energy you need to heat it.

Condensation & Moisture Control
Keeping on top of moisture in your van in winter is doubly hard. You want to keep the heat in, but you will constantly be dealing with wet clothes, cooking fumes and even the moisture in your breath.
- If you have the option the most effective way to combat this is to have a heating option that emits dry heat.
- Ventilation is the other key, but depending on the outside temperatures you will want to find your own balance with this. However, utilise vent fans and windows if you have them. Keep air moving.
- Cook with a window cracked or fans extracting.
- Make sure you dry all your clothes as quickly as possible

Combating wet clothes and gear 👕
Keeping perpetually wet clothes & gear dry during the winter can be a huge challenge depending on your van build and capabilities. Here are a few considerations to keep in mind:
- Have the ability to hang clothes in the van somehow, either with a clothesline pulled across your front cab or a small pop-up clothing rack.
- Try to position your wet clothes as close to your heater as possible
- Ensure that whilst your clothes are drying, you have some form of ventilation removing moisture from the air. This can be either your vent fans on extract or an open window.
- Another option is to dry your gear whilst you drive, with your front heaters blasting. Drape a few clothes over the front dash and your shoes in the passenger side footwell and have the heat coming out directed up to your windscreen and down to your footwell. DO NOT idle the van to do this. That is terrible for your engine and illegal in many of places.
- Once your gear is dry it is worth putting your boots next to your heater to ensure they dry properly and don’t start stinking! There are also many great electric boot/ shoe dryers, if you have a good electrical system to power them.
Biggest Gear Drying Tip: MAKE YOUR SHOWER A DRYING ROOM❗️
We aren’t afraid to exaggerate here. If you have a designated shower cubicle in your van (this is another major reason to have one), we would HIGHLY RECOMMEND having one of the ducts for your heating system, or another diesel heater, going into this area.
This means the shower area can be closed to become a hanging/ drying room for wet clothes and gear. Whilst the heater pumps in warm air, have your shower extractor fan running or at least popped open and in a couple of hours you will have dry gear!
This was a lifesaver in Norway when we not only had our ski and snowboard gear to dry but our skis and snowboards too!
Any melt water from ice left on the skis could later be swept down the shower drain and out the van. If you can do this in your van, it will make your time over winter much easier. For us, this is a WINTER VANLIFE ESSENTIAL!

Finding Places to Park in Winter 🅿️
If you want to stay off-grid, depending on where you are, finding places to park can be a mixed bag in winter. In some ways, it can be much tricker than in summer.
For example, if you are somewhere that gets a lot of snow, many parking areas may be closed/ under snow for chunks of the winter, limiting your options. ⛔️
In these environments you will need to keep on top of things like knowing local snow plough routes, keeping up to date on weather and road closures & current conditions and also being aware of things like the avalanche risk if you are parking anywhere in the mountains.
However, alternatively, there are way fewer people out in their campervans and on the road in winter, and this can mean that a lot of parking areas that might be crowded in summer could be empty in winter. Thus sometimes making your life easier.
Common places to look for parking include:
- Rest areas off of motorways and main roads
- City Streets (be aware of local laws and street signs)
- Retail Parks (Again keep an out for signs and restrictions)
- Ski Resort car parks (different rules everywhere)
- Service Stations
- Hotel Car Parks
- Areas near stadiums, large parks or leisure centres
- Open campsites (for a fee and you will need to research and ring around to find the open ones)
Parking availability varies by area. Apps like IOverlander and Park4Night are invaluable tools and take a huge amount of guesswork out of the equation.
Keep in mind though, that in areas like small towns, overusing these types of apps can sometimes lead to places becoming overrun and then closed down. 😔
So definitely use your judgement and mix it up in these places and don’t always head straight to the apps to report a good spot! Also, remember to always be respectful and polite when dealing with people in these areas.

PARKING APP TIPS 🅿️❗️
These tips will help you whittle down the number of spots that are worth driving to check out, saving you time & fuel.
- Check the reviews for the spots that are coming up. Don’t just look at the star rating, make sure to see how many reviews there are, how recent, and it may sound obvious, but actually read a good amount of them.
- It’s always best when someone has uploaded pictures of the park ups so you know what you are looking for.
- If you are asking the app to guide you to the location, don’t follow this route blindly. Sometimes the navigation is a bit off. Consider noting the address and manually entering it into Google Maps.
Finding Water 🚰 🤷♂️
As a lot of campsites will be closed and outdoor water taps shut off over the winter, finding water to refill your tank can be difficult.
There is no hard and fast rule on how best to stay on top of your water, and it will change dramatically based on your location and temperature, but here are a few things to keep in mind:
- Ensure you never pass on an opportunity to fill your tanks as you don’t know exactly when the next opportunity will be.
- Don’t be adverse to spending a little money at open campsites to use their water taps. This will take some calling ahead and research to find open campsites. 📞
- In areas used to cold winters, many service stations will have water taps kept inside a heated room or compartment. You will want to find out which chains and businesses have them. That way you can keep an eye out for more as you travel, and use Google Maps to search for them and pin locations. 📍
- Random commercial buildings and businesses can sometimes have running water that they are happy for you to use if you buy something, or are just polite enough to ask.
- It may be worthwhile carrying extra water bags in the van to help stretch further between refills.
- Unless you are sure you know where your next water refill is coming from, be very strict with your water usage. Consider showering away from the van more often and using less water to wash dishes. 🚿
- If possible, setting up a system to fill water bags indoors and then easily transfer them to your van’s water tank, either from outside or inside, is a smart move.
- Often car washes will have water taps.
- Apps like Park4Night can also help you find water as well as park ups.

Staying Warm Whilst Sleeping During Winter 🛌
To conserve fuel for the heater, we don’t keep the van as warm at night as we do in the daytime. During the day, we prefer the van’s temperature to be between 16-18ºC, but at night, we set our Truma to maintain a cooler 12-13ºC.
We know a lot of vanlifers who don’t have a heating option with a digital thermometer and switch their heating off overnight.
Whatever main heating option you have for your van here are a few extra ways to stay warm in your van overnight:
- Wear extra layers & and warm socks 🧦
- Have some water bottles to fill up and keep under the covers overnight
- Have extra blankets
- Electric heated blanket
- Invest in some curtains that can pull across the back doors of the van to combat any draft.
- Make a warm drink, like hot chocolate, to warm you up before bed.
- If you are parked at altitude, it may be worth driving to a lower altitude to park at the end of the day. The temperature will be warmer and most van heating options work more effectively at lower altitudes.
Dont Plan to Be Off in a Hurry
If you need to be off somewhere at a specific time in the morning, always give yourself ample time to ensure your van is ready to go and that you have checked the necessary weather and traffic apps.
No matter how well you ventilate or heat the van, waking up with ice or condensation on the front windscreen is commonplace during winter vanlife. This will need dealing with before you can hit the road.
Also, if you are in extremely cold places and have an engine pre-heater, you will want to switch that on in the morning and give it 20-30 mins to warm up your engine before you set off.
Additionally, you will also often get snowy surprises and have to get out and put on snow chains or clear snow before you can set off.
These are just a few things that can delay your daily departure during winter. So keep this in mind.

Extra Tips to Stop Things Freezing 🥶️
Always keep the interior of the van above 5ºC
To do this you will need to be able to monitor the interior temperature of your van. We use ‘Ruuvi’ sensors that we connect to via a Bluetooth app on our phones. We have them placed in multiple areas and compartments around the van.
If you have a heater with a digital thermometer this becomes easier as you can simply set the heater to keep the van at a certain temperature.
Be careful of things freezing to the floor
In areas that get below -10ºC regularly, you will see that items will freeze to the floor if left.
In all of our bottom cabinets, our shoe cubby and between our seats in the front cab (where we keep our snow chains and water hose), we have cut out and placed more DRY-Mat from ship shape bedding that all items sit on top of. This ensures an air layer between them and the floor.
Freezing Doors
When it gets cold enough, the rubber seals can freeze to the metal frame of the van, making it difficult to open the doors.
We applied some GUMMI PFLEDGE (a silicone-based lubricant) all around the seals of our doors before we went to Norway and it did great.
Frozen Pipes
In addition to insulating and covering cold spots in the van, another step to prevent your lines from freezing is to turn off your water pump and drain your water lines as much as possible into a container overnight.
The emptier your lines, the less chance they have of freezing and causing a loss of water pressure and flow.
Park in Gear and leave your handbrake off
Do not do this if you are parked on a slope. However, if you are on the flat and it’s really cold, leaving the handbrake off ensures that it doesn’t freeze on. But make sure you are in gear!

Check Your Travel Insurance Policy
This might not be a daily tip, but it’s crucial for enjoying winter vanlife: double-check your personal travel insurance policy. If you plan to engage in winter sports, ensure they’re covered. Activities like dog sledging, trekking, skiing, and snowmobiling often aren’t included in standard travel insurance packages.
We have found the best Nomad Insurance at Safety Wing, not only are we covered for 365 days for many sports worldwide, but their monthly subscription makes payments a breeze!
Where to Shower
This point depends on whether or not you have a shower in your van that you can use over the winter months. However, even then, if you want to conserve your water it may be wise to look for alternative shower options semi-regularly.
Wherever we go over winter, we join chain gyms, so mostly we use their showers.
Here are places that often have showers you can use (for a small fee):
- Leisure/ Sports Centres
- Spas
- Certain Rest Areas & Service Stations
- Gyms
- Campsites

Want to learn about the best van shower and toilet options? Check out our full van shower guide and our best van life toilet options article.
Dealing with Loneliness & Extra Time Indoors
This is very much dependent on individual circumstances and personality types. While some might share a van with a partner, others may not.
However, it’s important to consider the impact that spending extensive time in your van can have on your mental health and prepare accordingly. Winter conditions in a van can be significantly more challenging than in the summer, with unpredictable and adverse weather limiting outdoor activities.
You’ll want to get creative. However here are a handful of suggestions on ways to combat potential cabin fever:

- Most importantly, try to design and build a van that is cosy, homely and that you are happy/comfortable spending time in.
- Keep your van tidy (nothing sets cabin fever in faster than a dirty/ messy van).
- Make sure you have plenty of books/ board games/ video games or a way to play movies (whatever takes your fancy). Personally, we absolutely love reading and also spending time curled up watching movies on our ‘nebula capsule II’ smart projector (another vanlife essential for us). 📽
- Make friends with other vanlifers on social media, who are in the area you plan to be.
- Get to your local gym/ leisure centre/ local swimming bath/ spa etc on bad weather days.
- Explore your local town.
- Keep an eye out for social events in your local area.
- Try local restaurants & food.
Wondering what the best Vanlife jobs are? Check out our article here!
The Wrap-Up: Vanlife in Winter

Winter vanlife can be tough, there is a lot to think about and plan, and it certainly is not for everyone. However, whilst the season demands more from those who choose this lifestyle, it can also reward you with truly magical experiences that will stay with you forever.
The key lies in preparation, adaptability, and a positive mindset towards facing these challenges. With these in place, we believe winter on the road can be one of the most memorable times for vanlifers.
This guide has covered everything from the essential aspects of your van build needed to keep you and your vehicle’s components warm, to the additional gear and equipment required for safety on the road; as well as the day-to-day essentials like maintaining power, finding parking spots, and sourcing water.
We hope this guide has given you a clearer understanding of how to make your winter vanlife dreams come true.
Interested in all things vanlife? We have written about the ins and outs of living in a van in some of our favourite countries. Check the articles out below 👍